


To Connect Dhan with TejiFactor, follow these steps:
- Add DHAN Account Details in TejiFactor.
- Generate the Dhan ‘TOTP Key’ from the Dhan portal.
- Add “Static IP” on Dhan Portal.
- Connect your Dhan Account with TejiFactor.
Step 1: Add DHAN Account Details in Tejifactor
Go to Tejifactor’s Website using the following link: https://www.tejifactor.com/auth
Login to your Tejifactor Account.
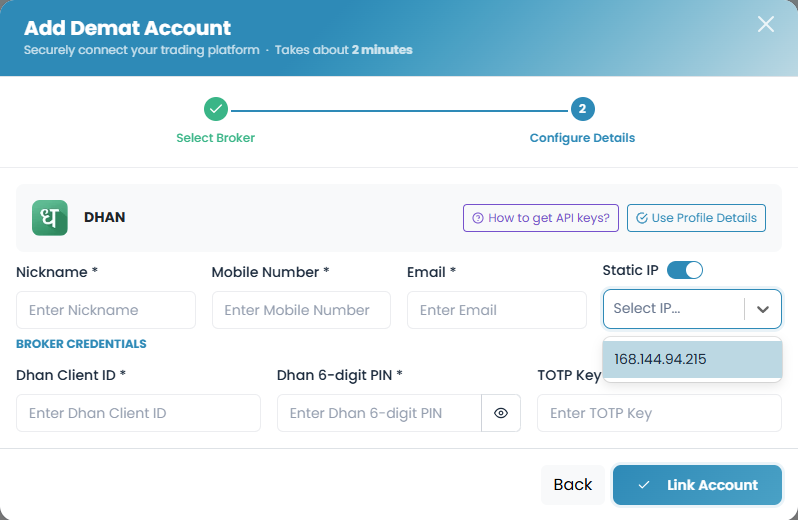
Go to the “Themes” tab and click on “Demat Accounts” Click on “Add Account” and Select “Dhan” as the broker and provide the following details:
- Nickname
- Mobile Number
- Email ID
- Select “Static IP” (Allocated after Subscribing to the Theme)
- Dhan Client ID (as per Step-2)
- Dhan 6-digit PIN
- TOTP Key (generated from the Dhan Portal as per Step – 3).
Step 2 : For Getting Dhan Client ID
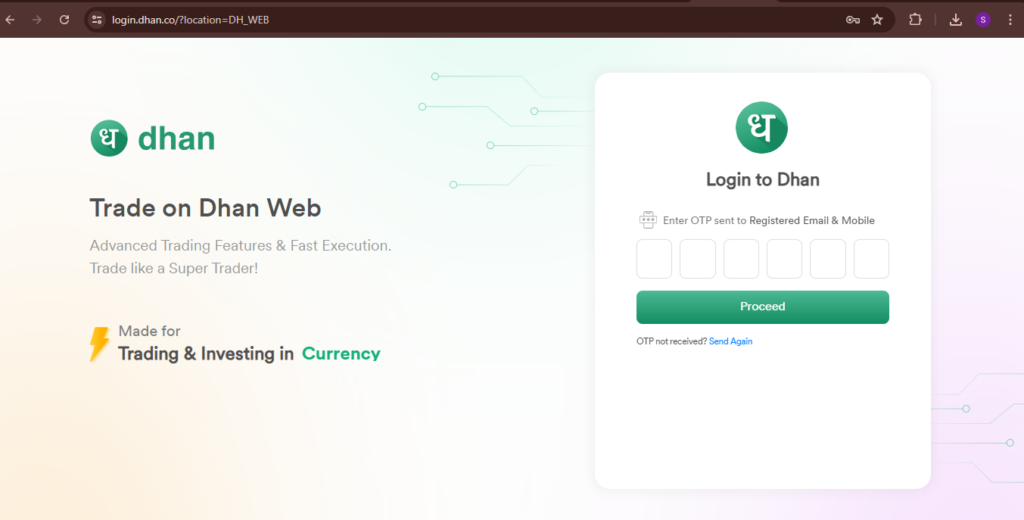
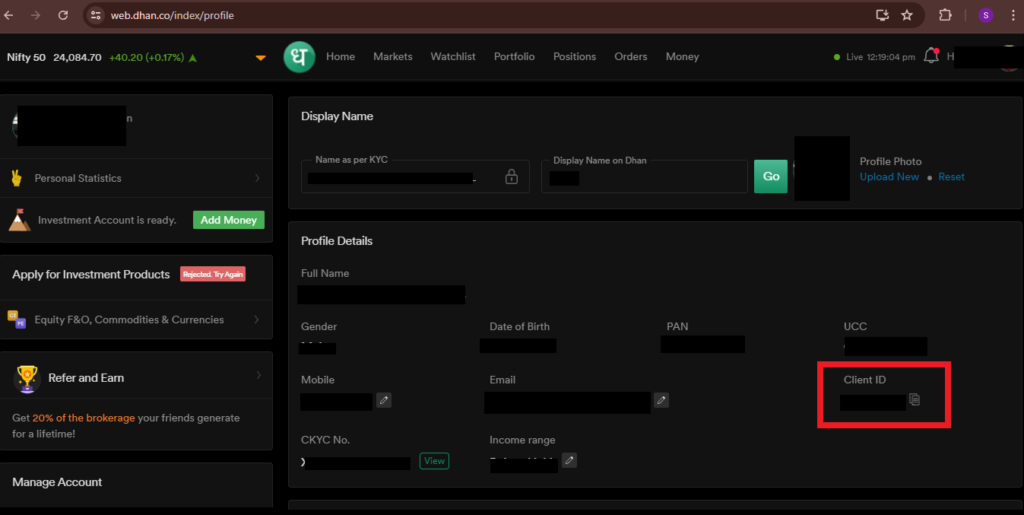
- Go to https://login.dhan.co/ to log in.
- Enter the Registered ‘Mobile Number’ and Dhan ‘Password’, and you will get an OTP on your registered email and on your registered mobile number.
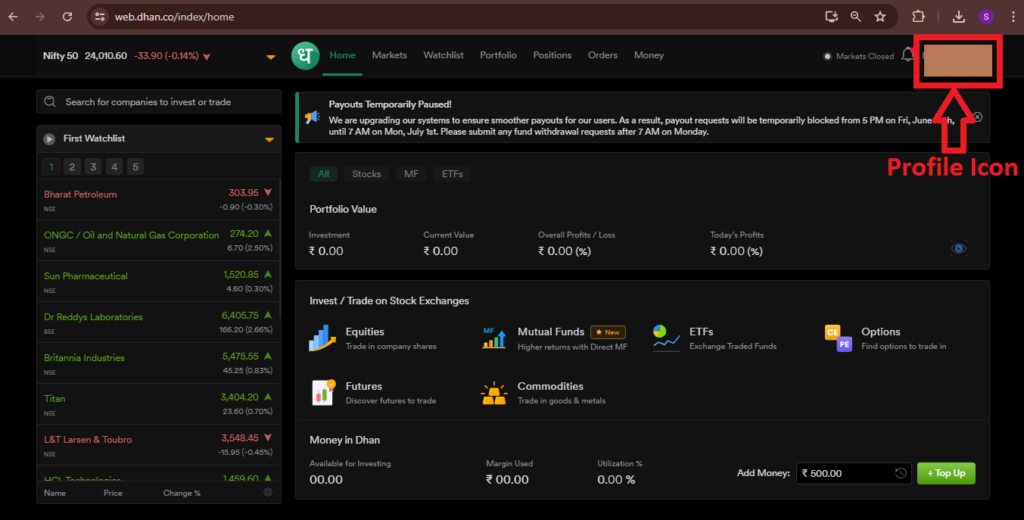
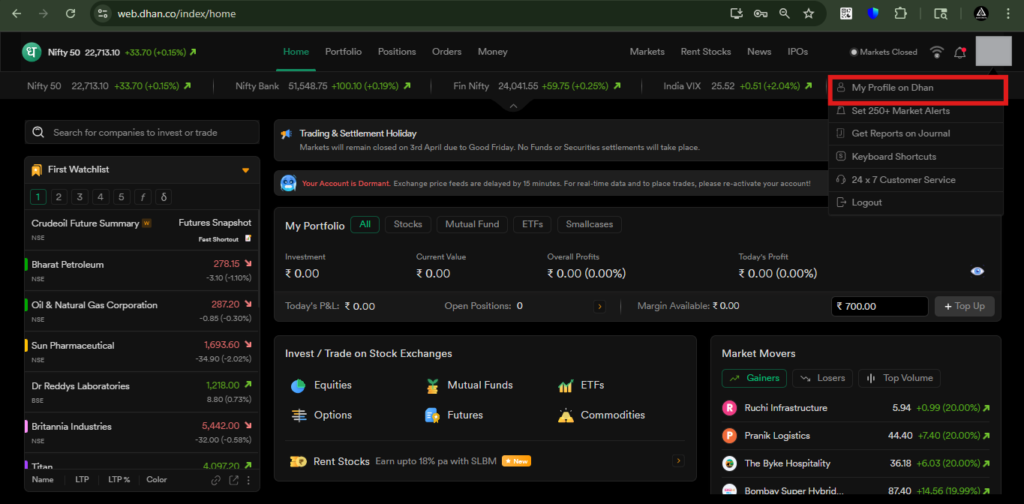
- After logging in, click on the Top-Right corner ‘Profile icon’ and click on “My Profile on Dhan”.
- You will see “Client ID” in the ‘Profile & Account Details’ section.

Step 3 : For Generation of TOTP Key
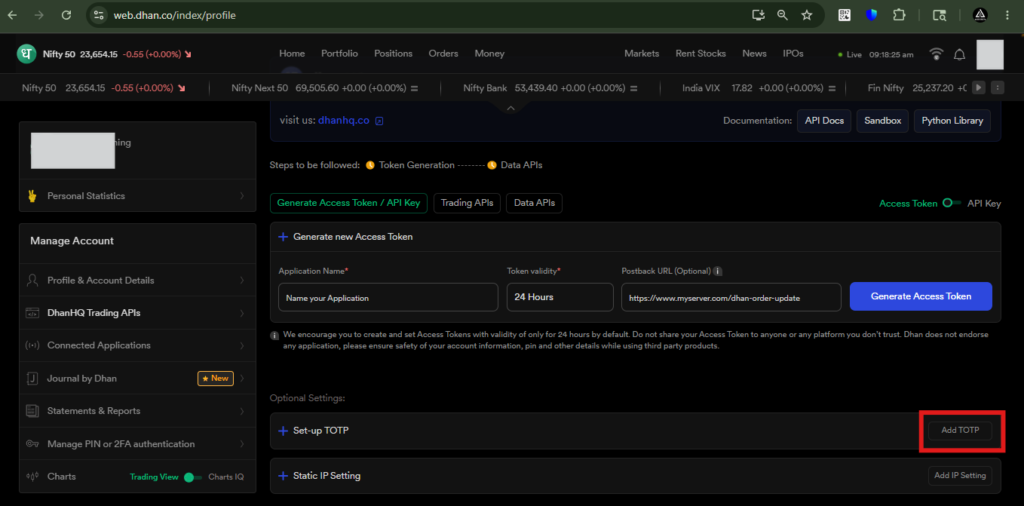
- Click on the top right corner profile icon and click on “My Profile on Dhan”. After that Click on “Access DhanHQ APIs” under Manage Account Section.
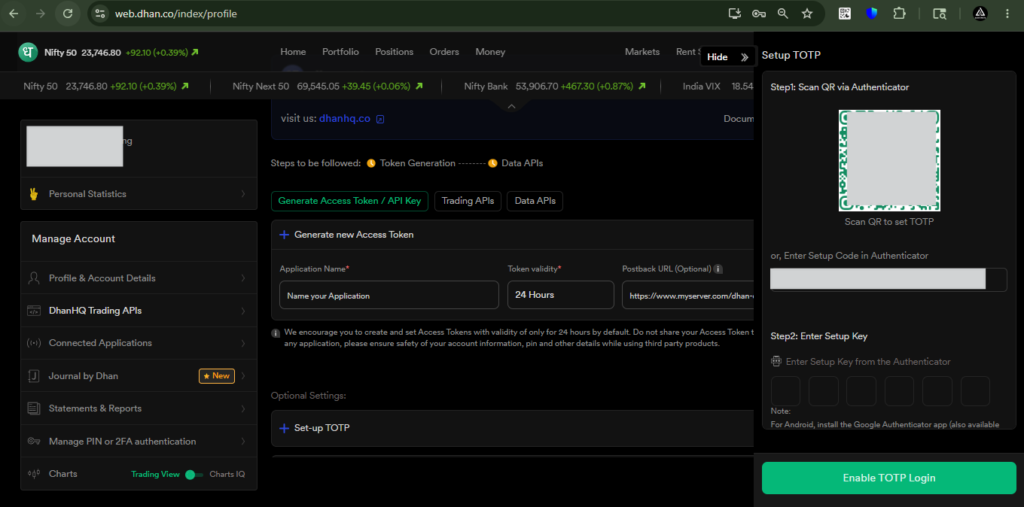
- Now, click on the “Add TOTP” button.
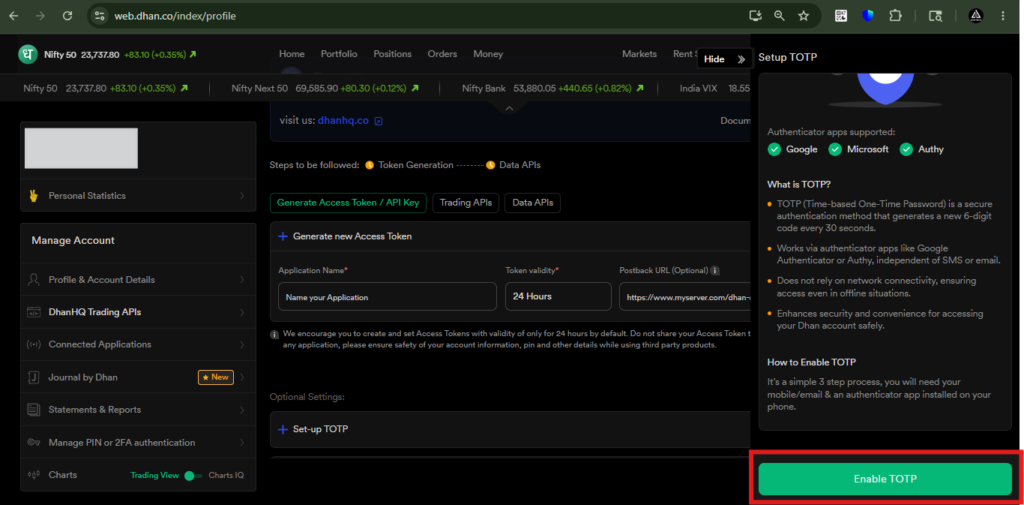
- Next, click on the “Enable TOTP” button.
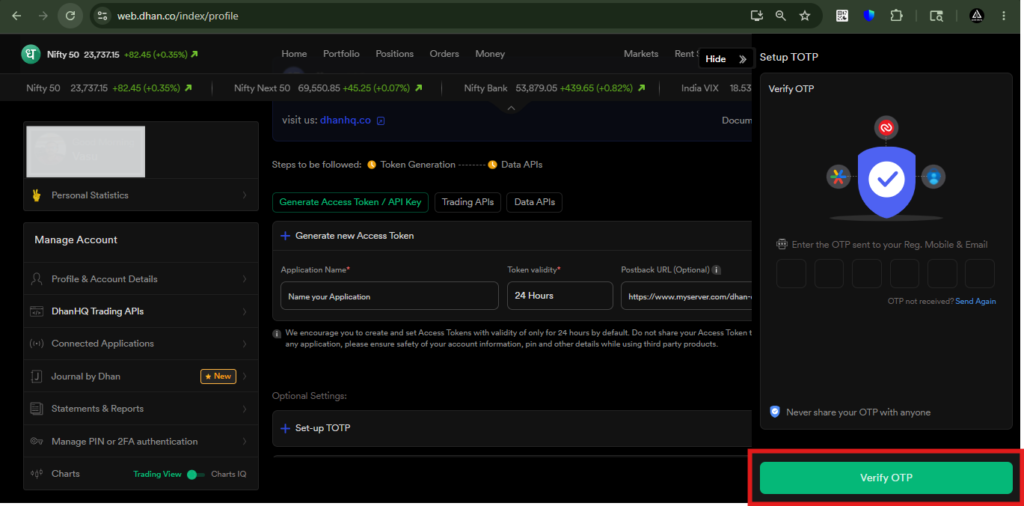
- Then, Enter the OTP received on your registered Dhan mobile number and click on the “Verify OTP” button to complete the authentication process.
Now, Copy the provided TOTP key (Setup Code under QR Code) and Paste it on Tejifactor.
Now, Scan the QR code using your Authenticator app to continue the secure login setup.
The Authenticator app will generate a 6-digit TOTP, Enter that 6-digit TOTP on Dhan to complete the Enable TOTP Login.
Step 4 : Add the Static IP on Dhan
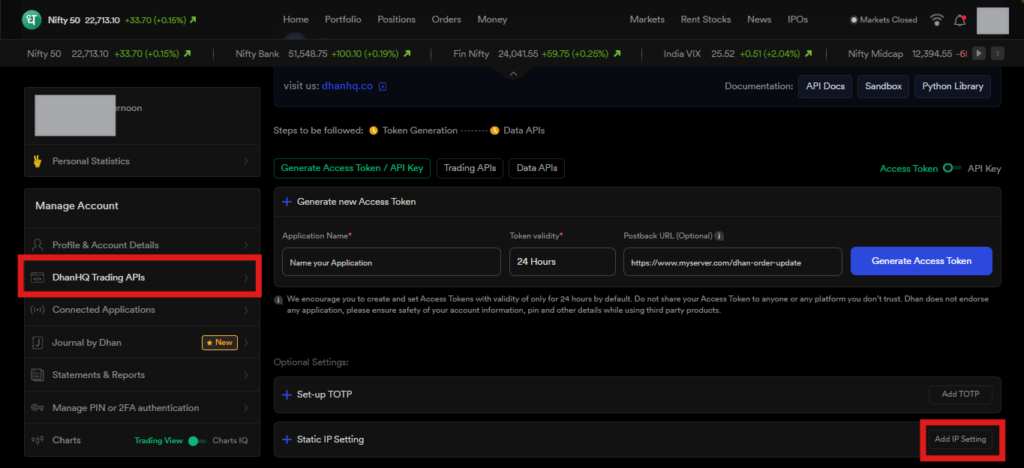
To Add a static IP on Dhan, Go to the “DhanHQ Trading APIs” tab and Click on the “Add IP Settings” option.
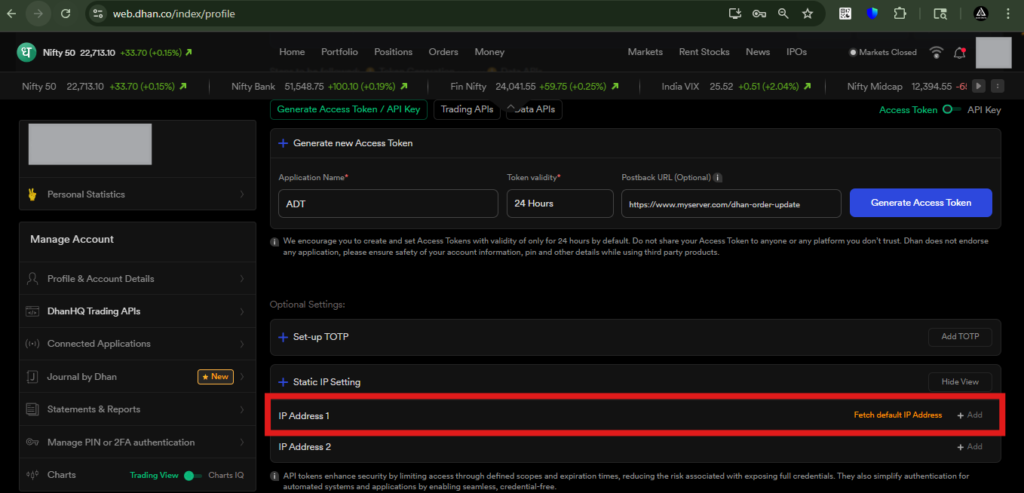
Next, Click the “Add” button under “IP Address 1” and Add your “Static IP” provided by TejiFactor.
Step 5 : Final Step on TejiFactor![]()
After Adding all Details on Tejifactor as per above Steps.
Click on “Link Account”. You will see a “Demat Account Connected” pop-up.

You’re All Set!
You have successfully connected your Dhan account with Tejifactor.